When you import two or more tables into Power BI, the relationships between those tables play a crucial role in displaying accurate calculation values and information in Power BI reports.
Power BI is a very intelligent tool, based on the same column names, Power BI’s auto-detect feature attempts to find and create relationships for you, but sometimes you may need to create relationships manually.
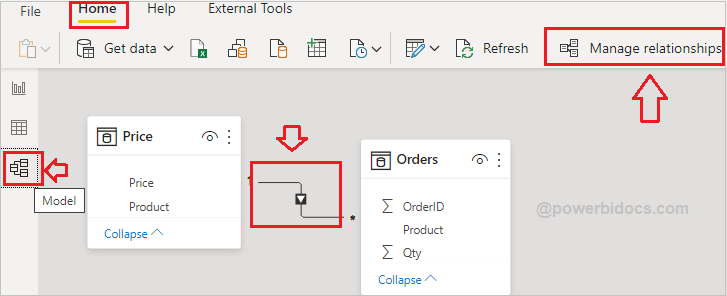
Additionally, you can create, edit, or remove relationships by using ‘Manage relationships’ under the Modeling tab.
Consider following two tables-
Table: Price
| Product | Price |
| Bike | 20000 |
| Car | 500000 |
| AC | 30000 |
| Bus | 1500000 |
Table: Orders
| OrderID | Product | Qty |
| 1 | Bike | 12 |
| 2 | Car | 11 |
| 3 | AC | 3 |
| 4 | Bus | 5 |
| 5 | AC | 1 |
| 6 | Bus | 2 |
| 7 | Bike | 1 |
Now, let’s assume you want to see the total price for products against each OrderId. To do this, you need the price of each product. Then, you can multiply each product’s quantity by its price to get the total price.
You can obtain the product price from the Price table, but it is not possible without a relationship between both tables. This is the reason why relationships are necessary between tables.
Create a relationship with autodetect
The Power BI autodetect feature attempts to find and create relationships for you. If you noticed, the column names ‘Product’ in both tables are the same.
Therefore, the autodetect feature will automatically create a relationship between both tables based on the ‘Product’ column. You can see this in the screenshot below.

Relationship example in Power BI
Now, right-click on the yellow-highlighted relationship line and select ‘Delete.’ Afterward, click on ‘Manage relationships.’
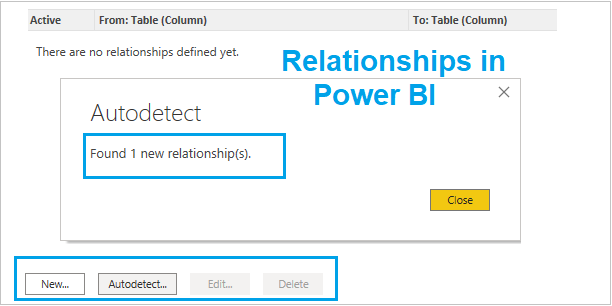
You can see in the screenshot above that the relationships between both tables have been deleted. Now, click on the ‘Autodetect’ button.

Manage Relationship Autodetect
After that, a dialog box appears with a success message. Close this box, and on the second screen, you can see the relationship between both tables.

Auto detect relationship in Power BI
Edit a relationship
You can Edit the Relationship in many ways-
Way-1: Go to Modeling tab in Power BI header menu > select Manage Relationships > In the Manage relationships dialog box, select the relationship, then select Edit.
Way-2: Inside Model view double click on Relationship line >Edit relationships dialog box appears.
Way-3: Inside Model view > Click on Home tab, select Manage Relationships > In the Manage relationships dialog box, select the relationship, then select Edit.
Edit Relationships in Power BI
Create a Relationship Manually in Power BI-
Way-1: Inside the Model view > Click on the Home tab, select Manage Relationships > In the Manage relationships dialog box, select New.

New Relationship in Power BI
After the ‘Create Relationship’ dialog box appears, select both tables in each dropdown and choose the ‘Product’ column from both tables, then click on the ‘OK’ button.

New Relationship Power BI
Way-2: Go to Modeling tab in Power BI header menu > select Manage Relationships > In the Manage relationships dialog box, then select New.
Delete Relationship in Power BI-
-Under Model view, right click on Relationship line and select Delete.
-Delete through Mange Relationships dialog box.
Hope you enjoyed the post. Your valuable feedback, question, or comments about this post are always welcome or you can leave us message on our contact form , we will revert to you asap.