
Azure VM’s are highly scalable, on-demand and powerful virtual machines. That can be created through the Azure portal.
Azure provides various kind of operating system images such as Ubuntu, CentOS, Redhat enterprise, SUSE and various windows OS images consisting of Windows 10 Pro, Windows Server 2019/2016/2012 R2.
Prerequisites for this:
- If you don’t have an Azure subscription, create a free account before you begin.
- Azure Storage Account, If you don not have, see here: how to create a Azure Storage Account.
Create virtual machine
Step-1: Sign in to the Azure portal at https://portal.azure.com.
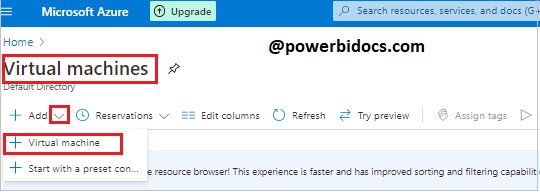
Step-2: In Home Page dashboard > Click on Virtual machines or you can search the same in search bar.

Step-3: Click on +Add button & select +Virtual machine.
Step-4: In the Basics tab, under Project details, select your subscription and then choose resource group.
If you don’t know how to create a resource group, see here: Create a Resource Group in Microsoft Azure.

Step-5: Under Instance details, provide the details for-
- Virtual machine name: Provide Virtual machine name
- Region: Choose a location which suits your application best or a location where you are near to.
- Availability options: Leave with default suggestion.
- Availability zone: Leave with default suggestion.
- Image: choose Windows Server 2019 Datacenter.
- Azure Spot instance: Leave with default suggestion.
- Size: The configurations of the VM such as RAM, Disk type, IOPs, and the corresponding cost of the configuration.

Step-6: Under Administrator account, Select Authentication type password and provide a username, and a password.
Under Inbound port rules, choose Allow selected ports and then select RDP (3389) and HTTP (80) from the drop-down.
Then click on Next: Disks> button.

Step-7: Under Disk options, you can choose the OS disk type, then click on create and attach a new disk.

Stpe-8: You can change the size of disk, click on change size > choose the size of disk then click OK button.

Step-9: Now click on Review + Create, then Create.
Step-10: It will take few minutes to deploy the Virtual machine.

Connect to the Virtual Machine
Now understand, how to create a remote desktop connection to the virtual machine and connect to your VM from a Windows computer.
Let’s Get started-
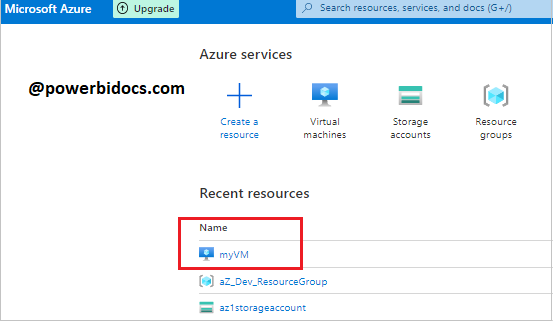
Step-1: Go to Home page > Under Recent resource > Open your virtual machine.
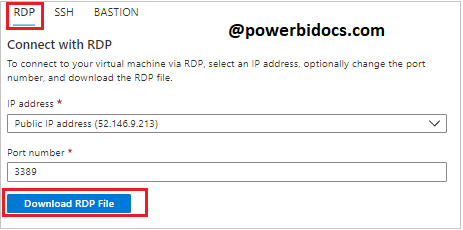
Step-2: Click on Connect then choose RDP.

Step-3: keep the default options to connect by IP address, over port 3389, and click Download RDP file.
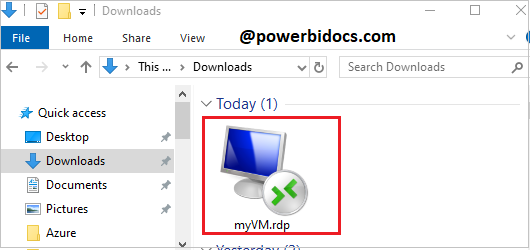
Stpe-4: Open the downloaded RDP file and click Connect when prompted.
Stpe-5: Enter VM credentials here.
- Username: Enter username you created for the virtual machine, format for user name : localhost\username.
- Password: Enter password you created for the virtual machine, and then click OK.

Step-6: If you receive a certificate warning during the sign-in process. Click Yes or Continue to create the connection.

Recommend Azure Post: Microsoft Azure Topics
Hope you enjoyed the post. Your valuable feedback, question, or comments about this post are always welcome or you can leave us message on our Contact form , we will revert to you asap.
![]()
Thanks