
In this blog you will understand “How to create a pipeline to copy data from Azure SQL Database table to Azure Blob Storage?”
A data factory might have one or more pipelines. A pipeline is a logical grouping of activities that performs a unit of work.
Here, you create and validate a pipeline with a copy activity that uses the input and output datasets.
The copy activity copies data from the Azure SQL Database Table you specified in the input dataset settings to the file you specified in the output dataset settings.
Prerequisites
- Linked services, Create linked services
- Datasets, see here how to Create datasets
Following these steps
Step-1: Click on Author Tab(Pencil Icon) > Mouseover the Pipelines > click on ellipsis icon > select New pipeline.
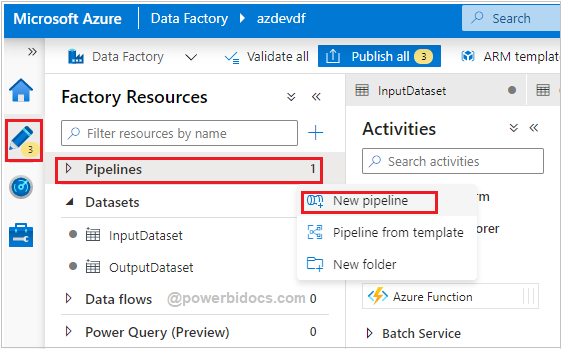
Step-2: Pipelines property windows appears in right side screen. Assign the name to Pipeline.
In the Activities toolbox, expand Move & Transform. Drag the Copy Data activity from the Activities toolbox to the pipeline designer surface.

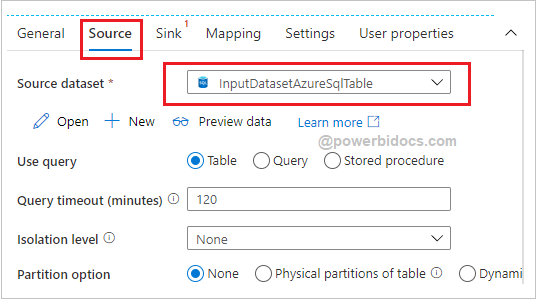
Step-3: Now switch to Source tab and select source dataset.
Step-4: Now Switch to Sink tab and select Destination Dataset.

Step-5: Now click on Validate button.

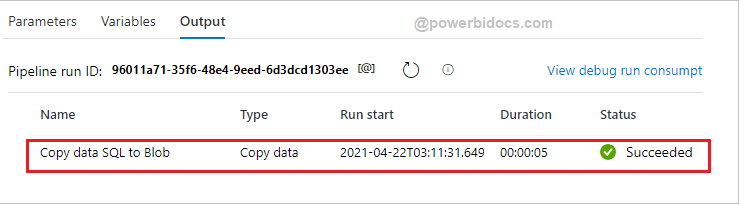
Step-6: After validation, click on Debug button to trigger the current pipeline for test run.

Step-7: Debug Status.
Step-8: After that click on Publish All > then Publish.
Step-9: Now you can check the output folder of the container, you will see the file.

Recommend Azure Post: Microsoft Azure Topics
Hope you enjoyed the post. Your valuable feedback, question, or comments about this post are always welcome or you can leave us message on our Contact form , we will revert to you asap.
![]()