
In this blog you will understand all about “How to create Azure SQL Database and SQL Server in Azure Portal?”
Prerequisites
- If you don’t already have a subscription, create a free Azure Account.
- Resource group – Create Resource Group
Following these steps in order to create a SQL database-
Step-1: Login in to the Azure Portal https://portal.azure.com/
Step-2: In Home page > Search SQL Database > and Select SQL databases.

Step-3: Click on + New > Select your subscription > Select Your Resource group.
After that provide Database name >If you don’t already have a Server, then click on Create new link.

Step-4: New server window appears > Provide Server name > assign user id and password for Server admin.

Step-5: You can also setup the database configuration. This defines the storage and CPU usages of the databases. For this click on Configure database.

Here you can choose purchasing model as per your requirement also can find out the cost summary of the selected purchasing model. For more details you can refer here Purchasing model

Step-6: Choose plan and click on Apply.
Step-7: After that click on Review + Create > then click on Create.
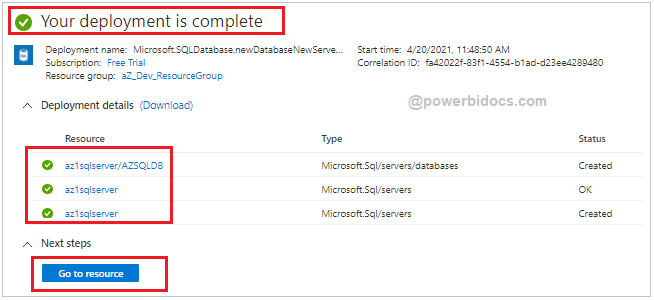
Step-8: It will take few seconds or minute to deploy the database and server. Then click on Go to resource.
Step-9: After that click on Query editor(Preview) link.
when you will enter your server admin detail to login into SQL server you will get an error of firewall as shown in given below image-
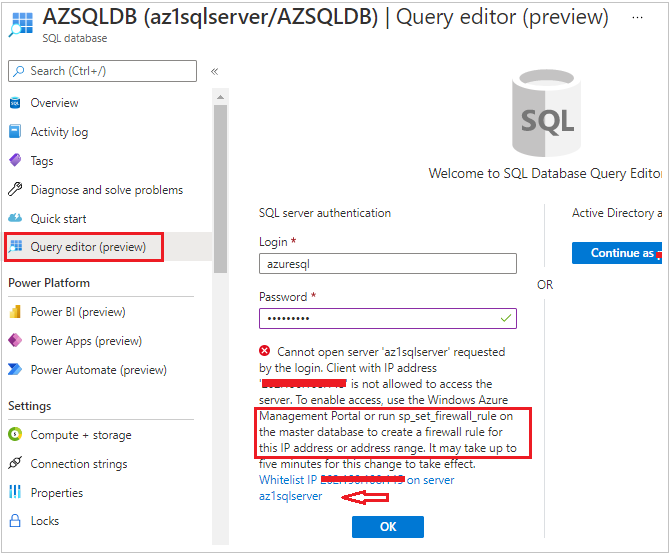
Step-10: Now click on that “Whitelist IP” link to update the firewall rules with this SQL server.

Step-11: As you can see in above screen shot firewall rules are successfully updated, now try to login into SQL Server.

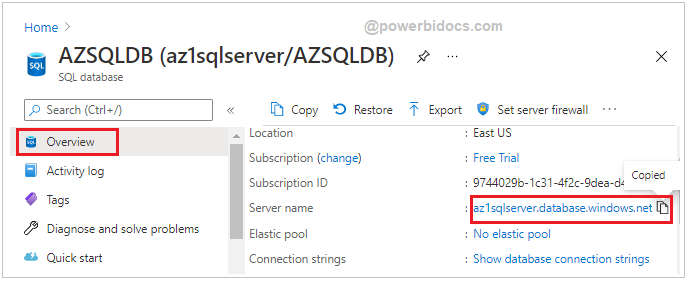
You can also login with you SQL server machine, for this you need SQL server name, login and password.
For server name – Go to Overview and copy the server name, and you know very well your login and password for the server(Which you enter at the time of server creation).
Now open SQL server and login with Azure server and login details.

As you can see in above screen shot we successfully logged into SQL server.
Recommend Azure Post: Microsoft Azure Topics
Hope you enjoyed the post. Your valuable feedback, question, or comments about this post are always welcome or you can leave us message on our Contact form , we will revert to you asap.
![]()