An Azure storage account is used to store azure storage data objects such as blobs, files, queues, tables, and disks.
The storage account provides a unique namespace for your Azure Storage data that is accessible from anywhere in the world over HTTP or HTTPS.
Refer: How to create a free Microsoft Azure Account & Create a Resource Group in Microsoft Azure
Follow these steps to create an Azure Storage Account
Step-1: Login into the Azure Portal https://portal.azure.com/
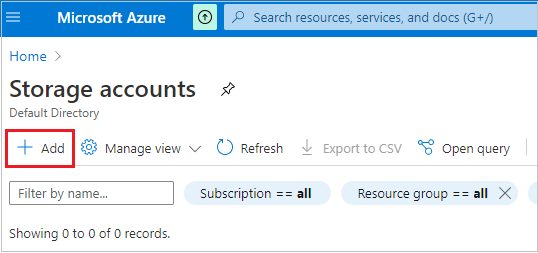
Step-2: In Home Page > Click to Storage account.

Step-3: Click to +Add button.
Step-4: Provide the following information for the new storage account.
- Subscription: Select your Microsoft Azure subscription.
- Resource group: Select an existing resource group or create a new one(Create a Resource Group in Microsoft Azure).
- Storage account name: Enter a name for your storage account that must be unique across Azure, and validate by azure itself for uniqueness.
- Location: Provide a location for your storage account, or you can use default selected location.
- Performance: Select the type of performance: Standard or Premium. The default is Standard.
- Account Kind: Set the Account kind field to Storage V2 (general-purpose v2).
- Replication: Specify how the storage account will be replicated. The default replication option is Read-access geo-redundant storage (RA-GRS).
- Blob Access tier: Specify the access tier for blobs in the storage account. The default tier is hot.

When you have made all of your configuration settings click the “Review + Create” button to move to the next step.
Step-5: Click to Create button

Step-6: Deployment of new Azure storage account will take a few seconds or minutes. When deployment is complete, you may access your storage account through the Azure Portal.

Recommend Azure Post: Microsoft Azure Topics
Hope you enjoyed the post. Your valuable feedback, question, or comments about this post are always welcome or you can leave us message on our Contact form , we will revert to you asap.
![]()