
In this blog you will understand “How to copy blob from one folder to another folder using azure data factory pipeline”
Azure Data Factory is the cloud-based ETL and data integration service that allows you to create data-driven workflows for orchestrating data movement and transforming data at scale.
You can refer Microsoft ADF document for more detail- https://docs.microsoft.com/en-us/azure/data-factory/
Prerequisites
To work with Azure Data Factory, you should have subscription, storage account & container. So please go through these article and setup all things before moving further.
- If you don’t already have a subscription, create a free Azure Account.
- Azure Storage Account, see Create a storage Account in Azure
- If you do not know how to create a container, see here: Create a Container.
Topics to be cover here
1- Upload a Blob into azure storage container
2- Create a Azure Data factory
Upload a blob to the azure storage container
Step-1: Now open your storage account container – Go to Home page > choose your storage account > click on Container box and choose your container.

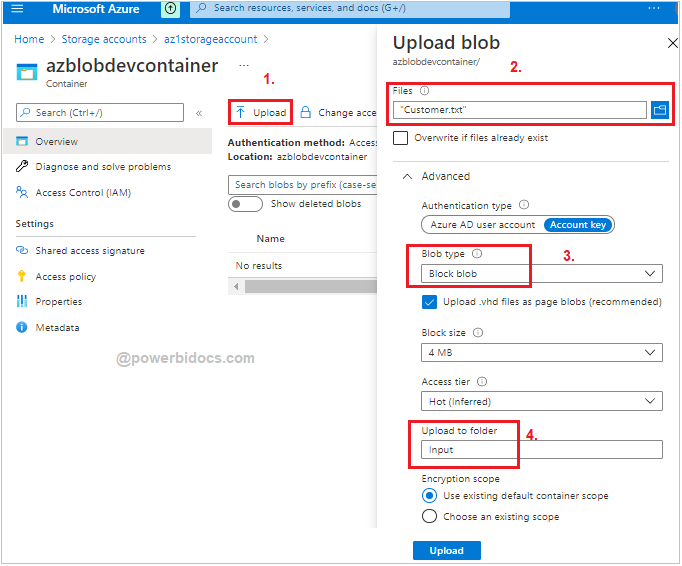
Step-2: Now upload blob into Container- Click on Upload button > Choose file >Select Blob type- Block Blob > Give Folder name > click on Upload.
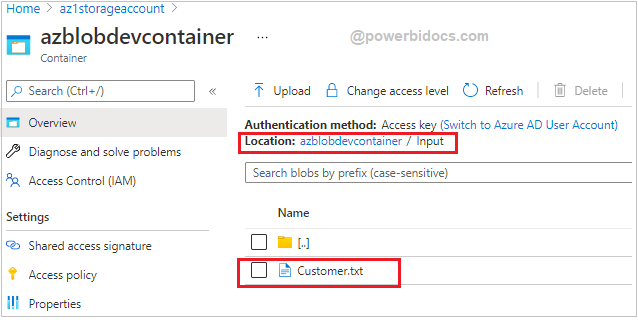
Step-3: Now you can see “Customer.txt” file has been uploaded inside input folder.
Create Azure Data Factory
Step-1: In Search bar type Data Factory > Click on Data Factories.

Step-2: Click on + New button, One window opens at the right corner of window screen.
- Now Choose your Resource group.
- Region: Choose a location which suits your application best or a location where you are near to.
- Assign Data factory name
- Select Version V2.
- After that Select Next: Git configuration, and then select Configure Git later check box.
- Select Review + create, and select Create after the validation is passed.
- select Go to resource to navigate to the Data Factory page.

Step-3: Select Go to resource to navigate to the Data Factory page. Or Go to Home Page > Open your Data factory.
Step-4: Now click on Autor & Monitor box. It will navigate you to separate window of Azure Data Factory.

Create a Linked Service
The linked service has the connection information that the Data Factory service uses at runtime to connect to it.
Here, you create a linked service to link your Azure Storage account to the data factory. As you know we are going to copy blob from one folder to another folder, so for this one linked service is sufficient.
Note: If you want to copy data from Azure SQL database to Azure blob storage, so in that case you have to create two separate linked service:
1- Azure SQL database to Data factor
2- Azure blob storage to Data factory.
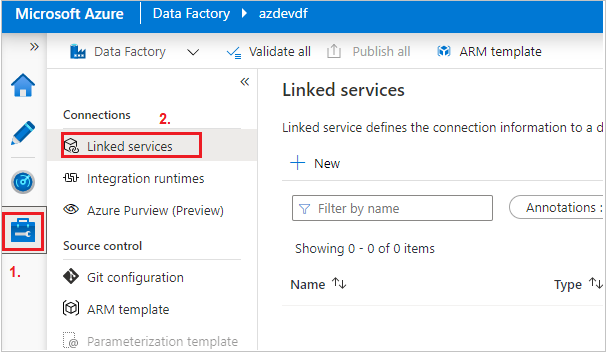
Step-1: Click on Mange Tab > Select Linked service > Click on + New button
Linked service
Step-2: New linked service windows open in right side screen, search Azure blob storage and click on continue.
Step-3: Now assign the proper linked service name, choose azure subscription & storage account name and click on create.

Step-4: Linked service created successfully.
Create Datasets
Here, you create two datasets: one for input and other for output, or you can say datasets for source and destination.
These datasets are of type Azure Blob. They refer to the Azure Storage linked service that you created earlier.
Step-1: Click on Author tab(Pencil icon) > Mouseover the Datasets and click on ellipsis icon(…) >Select New dataset

Step-2: New Dataset windows opens > Search Azure Blob storage > Select file format Binary(because our file is in txt format).
Step-3: Assign proper name to dataset > Select Linked service name > browse input folder file path from container. After that click on Ok button.

Step-4: Now create another dataset for output. Mouseover the Datasets and click on ellipsis icon(…) >Select New dataset
Step-5: New Dataset windows opens > Search Azure Blob storage > Select file format Binary.
Step-6: Assign proper name to output dataset > Select Linked service name > give output folder path where you want to copy input folder file. After that click on Ok button.
Here, It will create one folder with name “Output” automatically inside the same container, and output file name will be “outputresult.txt”
If output folder is already there then choose the complete path till folder and assign the file name manually.

Step-7: You can see, datasets has been created successfully.

Create Pipeline
Here, you create and validate a pipeline with a copy activity that uses the input and output datasets.
The copy activity copies data from the file you specified in the input dataset settings to the file you specified in the output dataset settings.
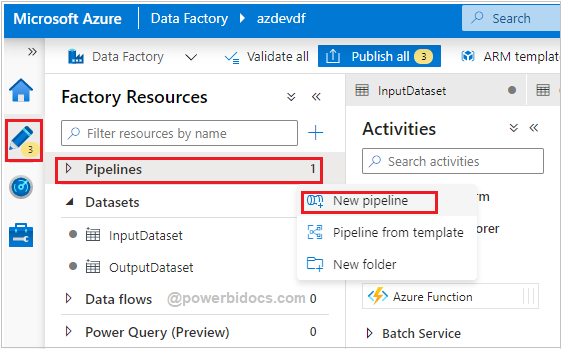
Step-1: Click on Author Tab(Pencil Icon) > Mouseover the Pipelines > click on ellipsis icon > select New pipeline.
Step-2: Pipelines property windows appears in right the screen. Assign the name to Pipeline.

Step-3: In the Activities toolbox, expand Move & Transform. Drag the Copy Data activity from the Activities toolbox to the pipeline designer surface.

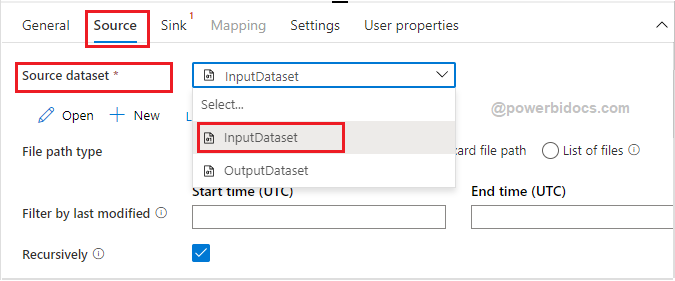
Step-4: Now switch to Source tab and select source dataset (InputDataset).
Step-6: In same way now switch to Sink tab and select OutputDataset.

Step-7: Now click on Validate, as you can see pipeline has been validated successfully. If you got any error then check again the source & sink mapping properly.

Debug the Pipeline
Step-1: After validation, click on Debug button to trigger the current pipeline for test run.

Step-2: Now you can see debug status showing succeeded that mean data has been copy from one blob to another.

Step-3: Now you can check the output folder of the container, you will see the file.

Step-4: After that go to the azure data factory > Open Pipeline > and click on Publish all button.
So, in this blog we successfully created a pipeline for copy data from one blob to another blob.
Recommend Azure Post: Microsoft Azure Topics
Hope you enjoyed the post. Your valuable feedback, question, or comments about this post are always welcome or you can leave us message on our Contact form , we will revert to you asap.
![]()