
Azure Files is a cloud based file system that can access via SMB protocol.
Mainly, Azure files storage can be used if you want to have a shared drive between two servers or across users.
Once you create Azure File share it can be access from anywhere using Windows, Linux or macOS.
Note: The Server Message Block (SMB) Protocol is a network file sharing protocol, and as implemented in Microsoft Windows is known as Microsoft SMB Protocol.
Advantages of Azure Files
- Replaces or supplement on-premises file servers
- “Lift and shift” applications, move applications from one to another environment without making any re-design or changes.
- Simplify cloud development
- Shared application settings
- Diagnostic share
- Dev/Test/Debug
Prerequisites for this:
- If you don’t have an Azure subscription, create a free account before you begin.
- Before you can work with an Azure file share, you have to create an Azure storage account. If you don not have, see here: how to create a Azure Storage Account.
- Ensure port 445 is open: The SMB protocol requires TCP port 445 to be open, connections will fail if port 445 is blocked.
Follow these steps to create an Azure Files share
Step-1: Login in to the Azure Portal https://portal.azure.com/
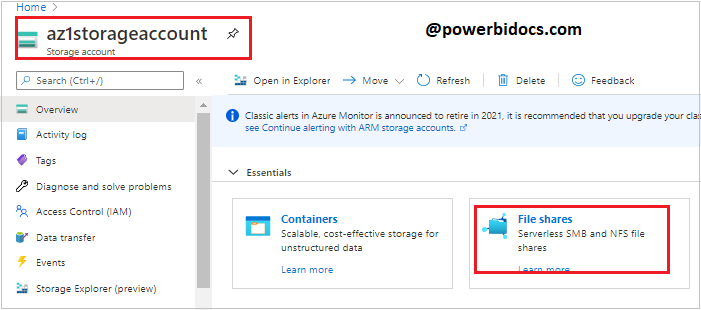
Step-2: In Home Page > Click to your storage account.

Step-3: Click on File shares box.
Step-4: Click on +File share then provide the name and Quota of the file share.
- Name: Provide the name to new file share.
- Quota: The quota can be a maximum of 5 TiB.

Step-5: File share created successfully. Click on file share name.

Step-6: Now click to Connect, and copy the Windows script.

Step-7: Open Power Shell and paste the script into a Power shell to mount the file share and run it.
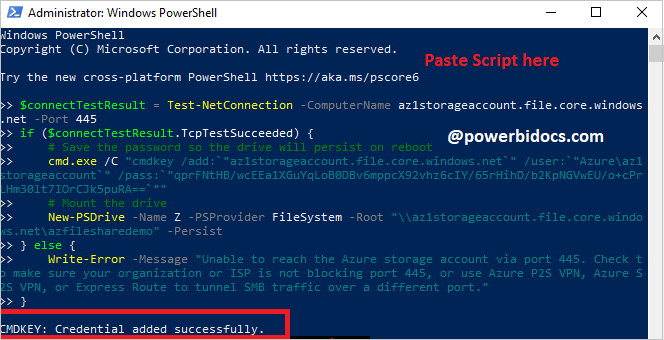
You have now mounted your Azure file share.
Mount the Azure file share with File Explorer
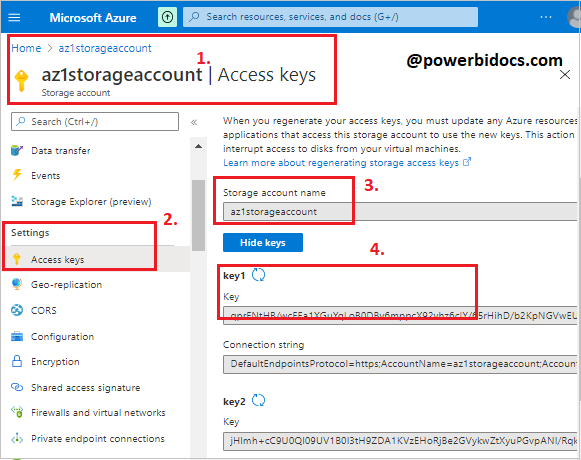
Prerequisite for this:- Noted down your storage account name & access key, later we will use this.
Open Storage account > click on access keys > copy storage account name & key 1.
Now Let’s start step by step-
Step-1: Open File Explorer > Click on This PC > Computer > Map network drive > select Map network drive

Step-2: Enter the UNC path, the UNC path format is:
\\<storageAccountName>.file.core.windows.net\<fileShareName>.
For example: \\anexampleaccountname.file.core.windows.net\example-share-name.
Here, enter your Azure storage account name & File share name

Step-3: Use the storage account name prepended with AZURE\ as the username and a storage account key as the password.

Step-4: Now you can see Azure file share.

Step-5: Now back to the Azure portal and open Azure files share and upload some files.
Click on Upload > Browse file > Upload.

Stpe-6: Now you can see the Azure portal uploaded files into the windows Azure files network location.
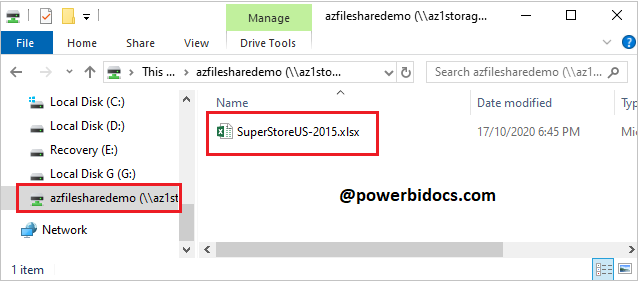
And if you create any new file under this network location, it will be automatically reflect under Azure portal in Azure files share. It will work like vice-versa.
Recommend Azure Post: Microsoft Azure Topics
Hope you enjoyed the post. Your valuable feedback, question, or comments about this post are always welcome or you can leave us message on our Contact form , we will revert to you asap.
![]()